Turnips are versatile vegetables in the brassica family that are considered easy to moderate to grow. They are unique in that they function as both a cool crop and a hot crop, meaning they can be planted in your outdoor garden at almost any time during the year. Turnips are highly productive, as both the bulbous roots and the leafy greens are edible.
Planting
- Method: Turnips should be direct-seeded into the garden soil rather than transplanted.
- Timing: Turnips are flexible and can be planted in the garden any time between mid-April and early-September for harvest 45-75 days later, depending on the variety.
- Location and Sun: For full-sized turnip bulbs, select a spot with full sun to ensure the roots size up properly.
- Soil Preparation: Turnips are medium feeders. Cultivate the top 6″ of soil and add compost before planting to provide nutrients and ensure well-draining soil.
- Spacing and Depth: Plant seeds 1/2″ deep and 6” apart in rows that are 12″ apart. Certain varieties like Hakurei can be spaced 4” apart.
- Germination: Seeds typically germinate in 5–7 days.
Maintenance
- Watering: When the plants are young, water the soil regularly to keep it consistently damp, but never sopping wet to avoid rot. As they approach maturity, water deeply but infrequently to prevent root rot.
- Weeding: Staggered plantings can help you manage your harvest, but ensure the area remains well-weeded so that the turnips don’t have to compete for space or nutrients.
- Fertilizing: As medium feeders, they benefit from a top-up of phosphorus-rich fertilizer midway through their growth cycle to help the roots enlarge.
- Thinning: If you harvest turnips for their greens, the roots will not grow as large. To enjoy both, limit your harvest to about 5 outside leaves per plant.
Pests and Diseases
- Common Pests: Turnips are susceptible to brassica pests such as aphids, cabbage worms, flea beetles, slugs, and snails.
- Management: Use fine-mesh row covers to prevent flying insects from laying eggs on the leaves. Dusters of food-grade diatomaceous earth can also deter crawling pests.
- Disease Prevention: To avoid soil-borne diseases like clubroot, rotate your crops so that brassicas are not grown in the same spot for more than 3 to 4 years.
Harvesting
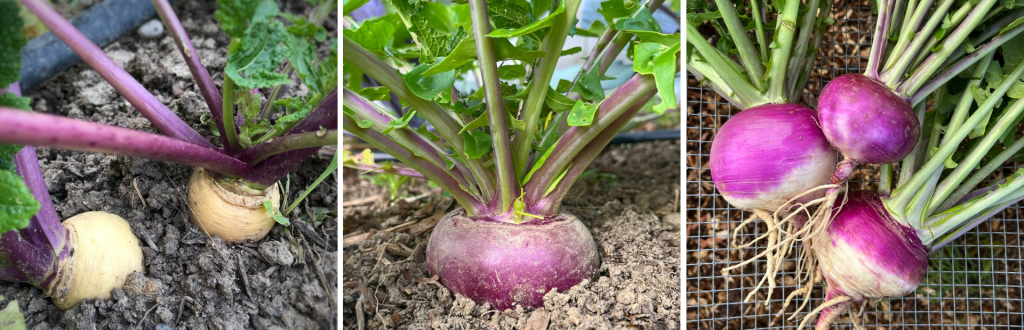
- Timing: Most turnips are ready for harvest once the root “shoulders” are 3″ or wider. Smaller roots are sweeter while larger roots are, of course, more fulsome.
- Technique: Harvest by pulling the entire plant out of the ground.
- Staggering: Staggering your planting times for turnips is highly valuable, as it allows you to enjoy several small harvests over a few weeks rather than one large flush.
- Storage: Store the roots in a slightly permeable plastic container in the refrigerator. Greens should be stored separately from the roots in air-tight containers and used within a few days.
💡 Tips for Toronto Gardeners 💡
Because turnips are brassicas, they are magnets for flea beetles in the early Toronto spring. I strongly recommend using a row cover immediately after seeding in April. This simple step keeps your turnip greens looking beautiful and prevents the “shotgun hole” damage that these tiny beetles are known for.
Ready to Grow More?
Join our community of gardeners and start growing your own food in the city! From balcony boxes to backyard plots, community gardens, and urban farms, we’re dedicated to helping you succeed in vegetable gardening and urban agriculture.
- In the Greater Toronto Area (GTA)? Join Our Program at Downsview Park: Enroll in our full-season Grow Veggies program for hands-on learning and a share of the harvest.
- Get Monthly Tips: Sign up for our monthly Grow With Us newsletter to receive seasonal tips and our gardeners’ to-do lists.
- Follow Us: Find us on Instagram or Facebook to see what we’re growing at our teaching garden in Toronto.
